.png)
Stripe is the true king of payment merchant software.
Simple, easy, and incredibly flexible.
Except when it comes to… failed payment reporting.
Okay, really, it’s probably one of the easier payment merchants to pull failed payments from.
But, that doesn’t mean it’s not without some teeth pulling and nifty spreadsheet work.
Sure, Stripe can filter your failed pays and give you visibility within the console. But, without looking at it in a Google Sheet, you have no way of knowing what you’re actually losing every month.
No worries, though! Because this is exactly what we’re here for.
Below we’ll outline in super easy steps how to pull failed payments in Stripe and get a true read on your failed pays every month.
Filter Your Stripe Account
Stripe’s dashboard doesn’t make it readily available where you failed payments are within your payment merchant:
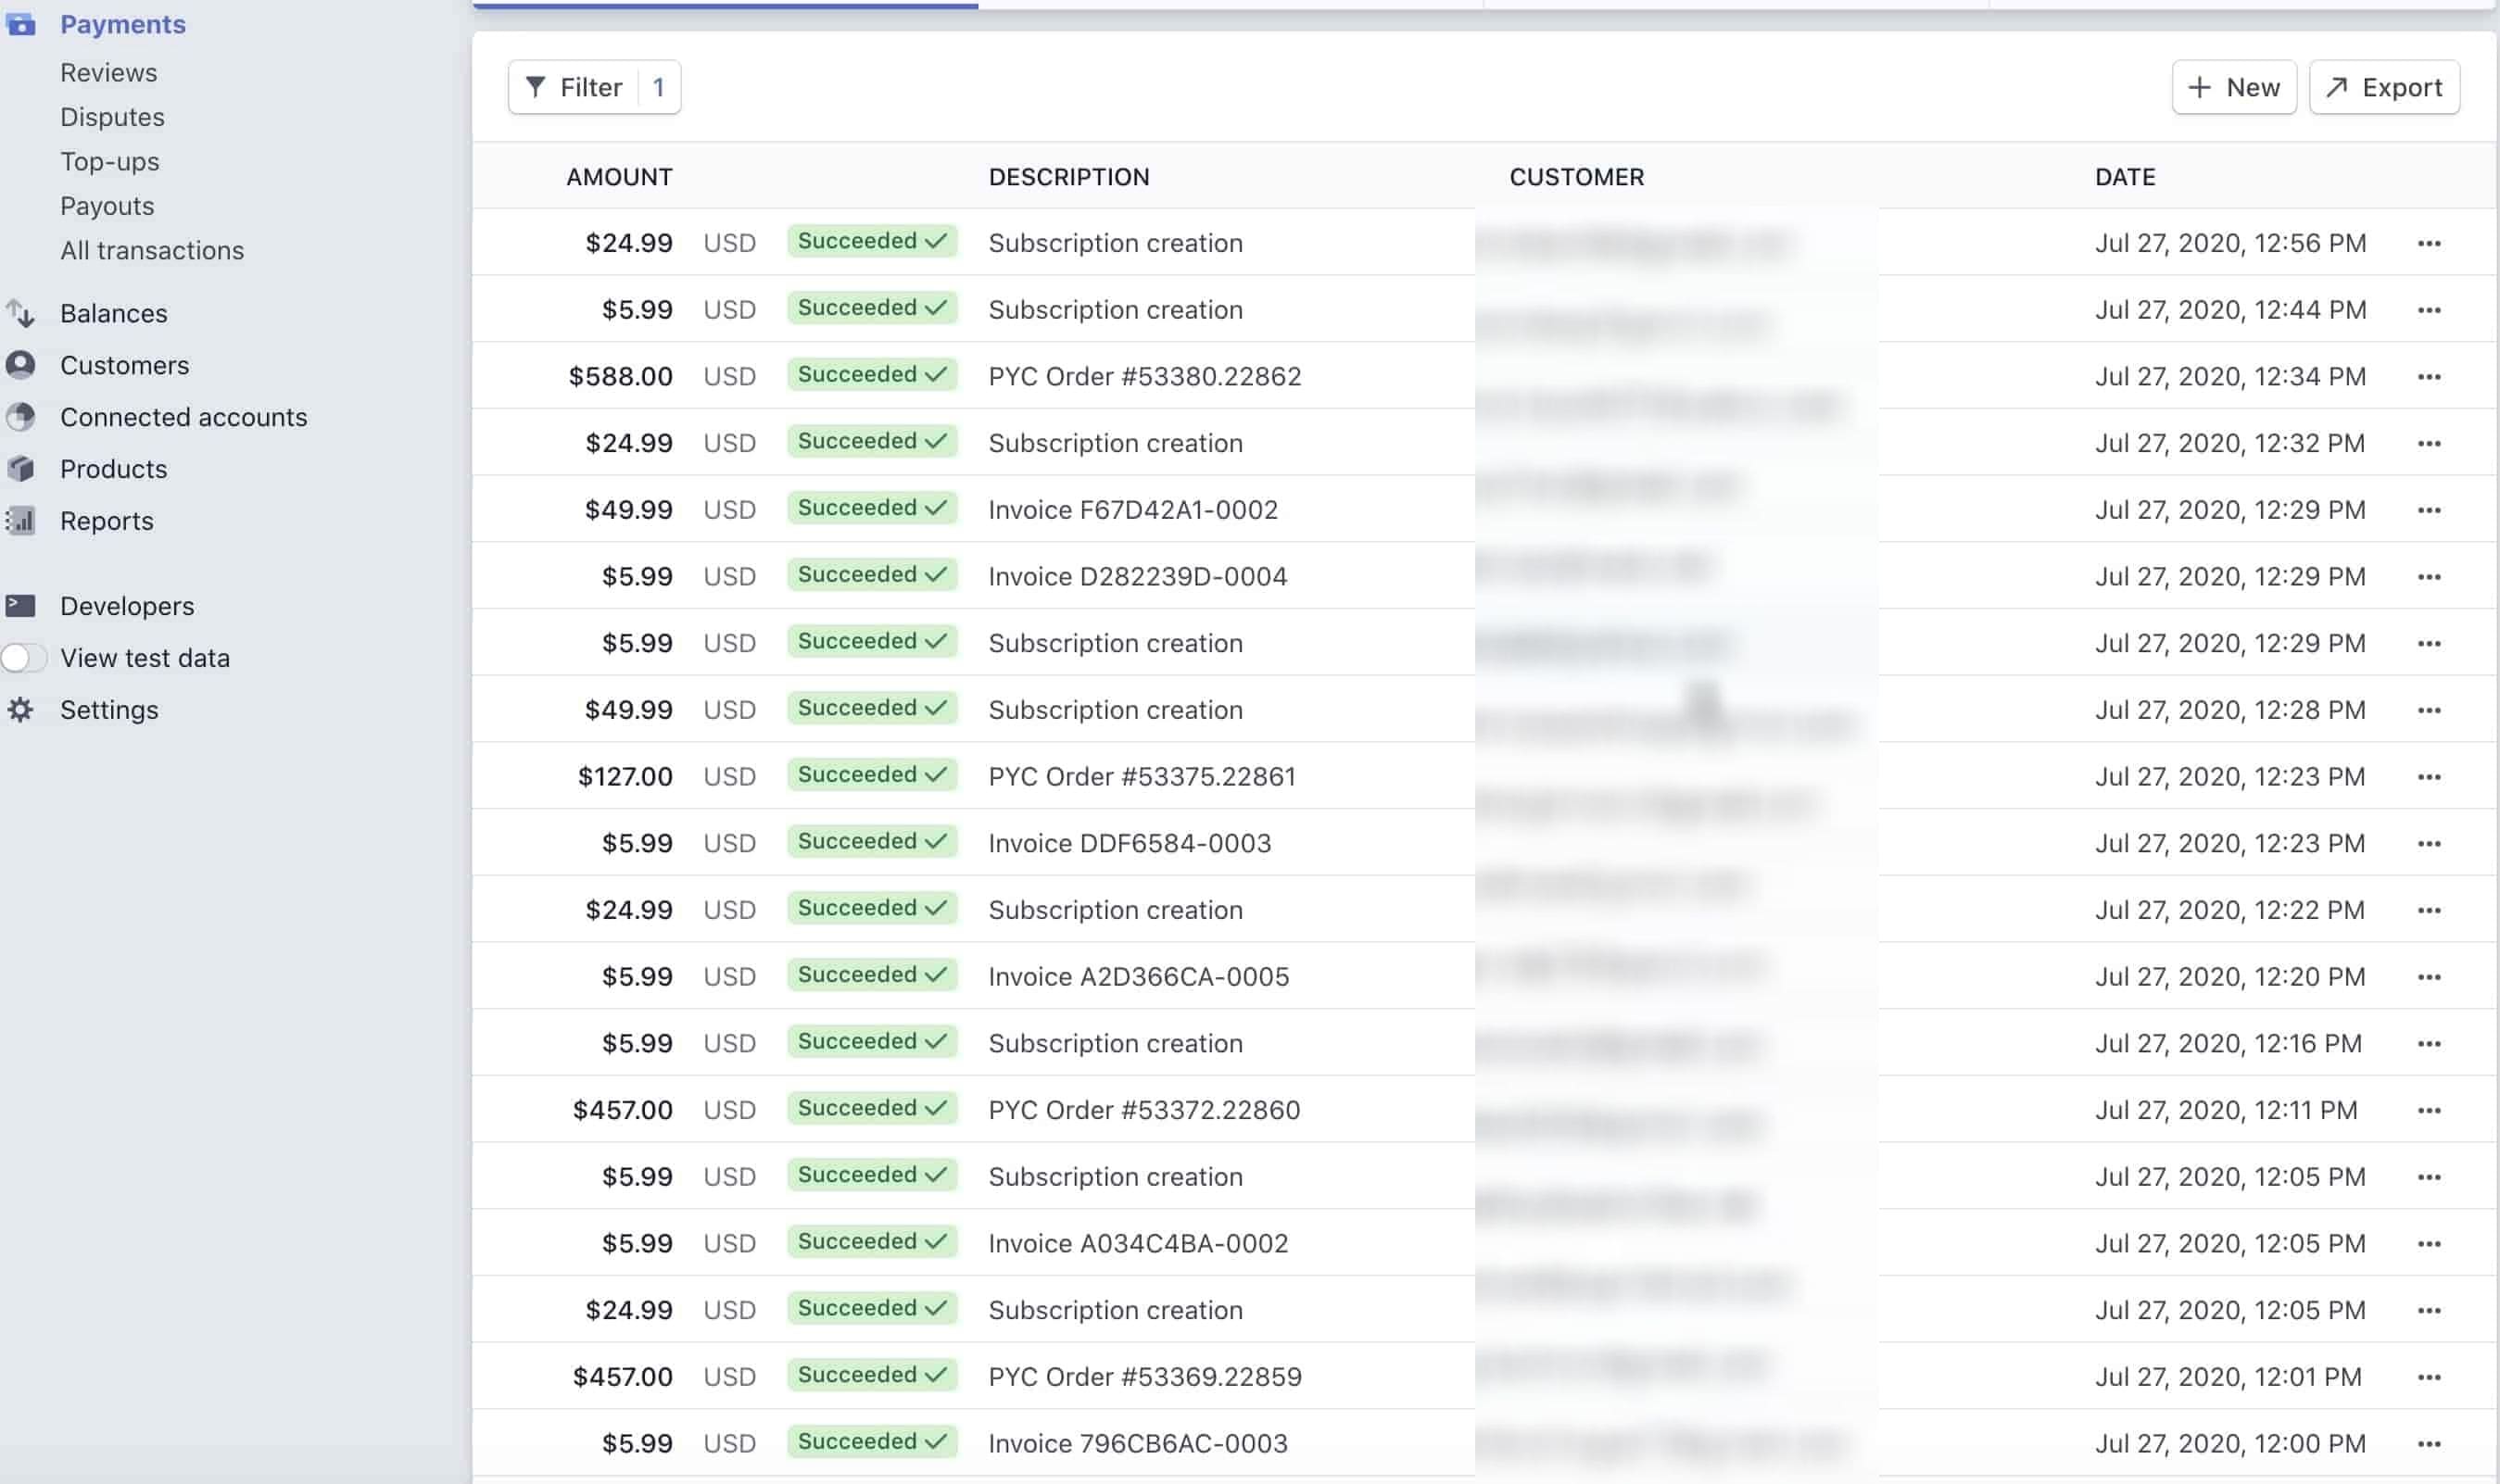
Here’s the layout you see for your Payments tab within your Stripe dashboard. Look at all that green 😎.
But underneath that is where all your underlying issues may be lurking.
So, let’s pull out that failed payment data.
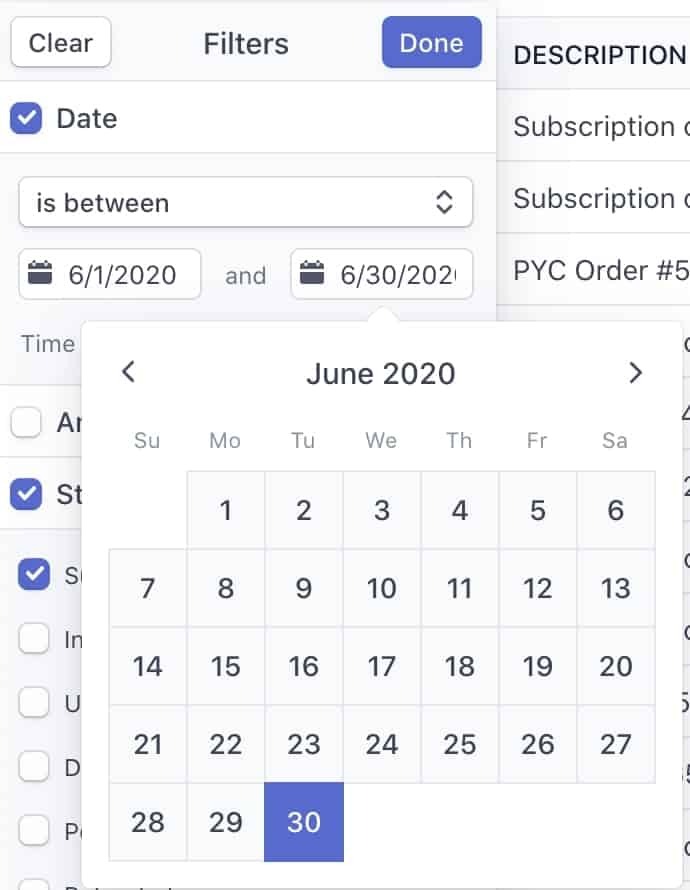
To start, you hit the Filters tab and choose your date range. Use the between function and pick the range you want.
We recommended picking a solid month. So if the above image says July, we would go back to June and choose the entire month.
You can also pull by week or even day if you’re inclined.
Next, switch off the default “Succeeded” check box and scroll down to choose “Failed.” Stripe has it towards the bottom, so it can be easy to miss:
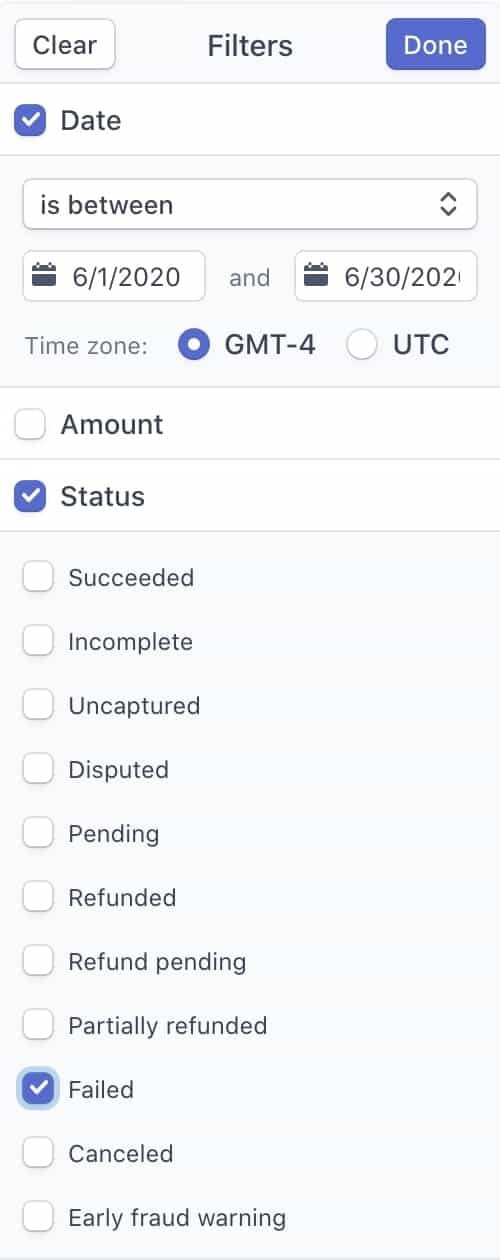
After you do that, hit “Done” and your Failed Payment list will load!
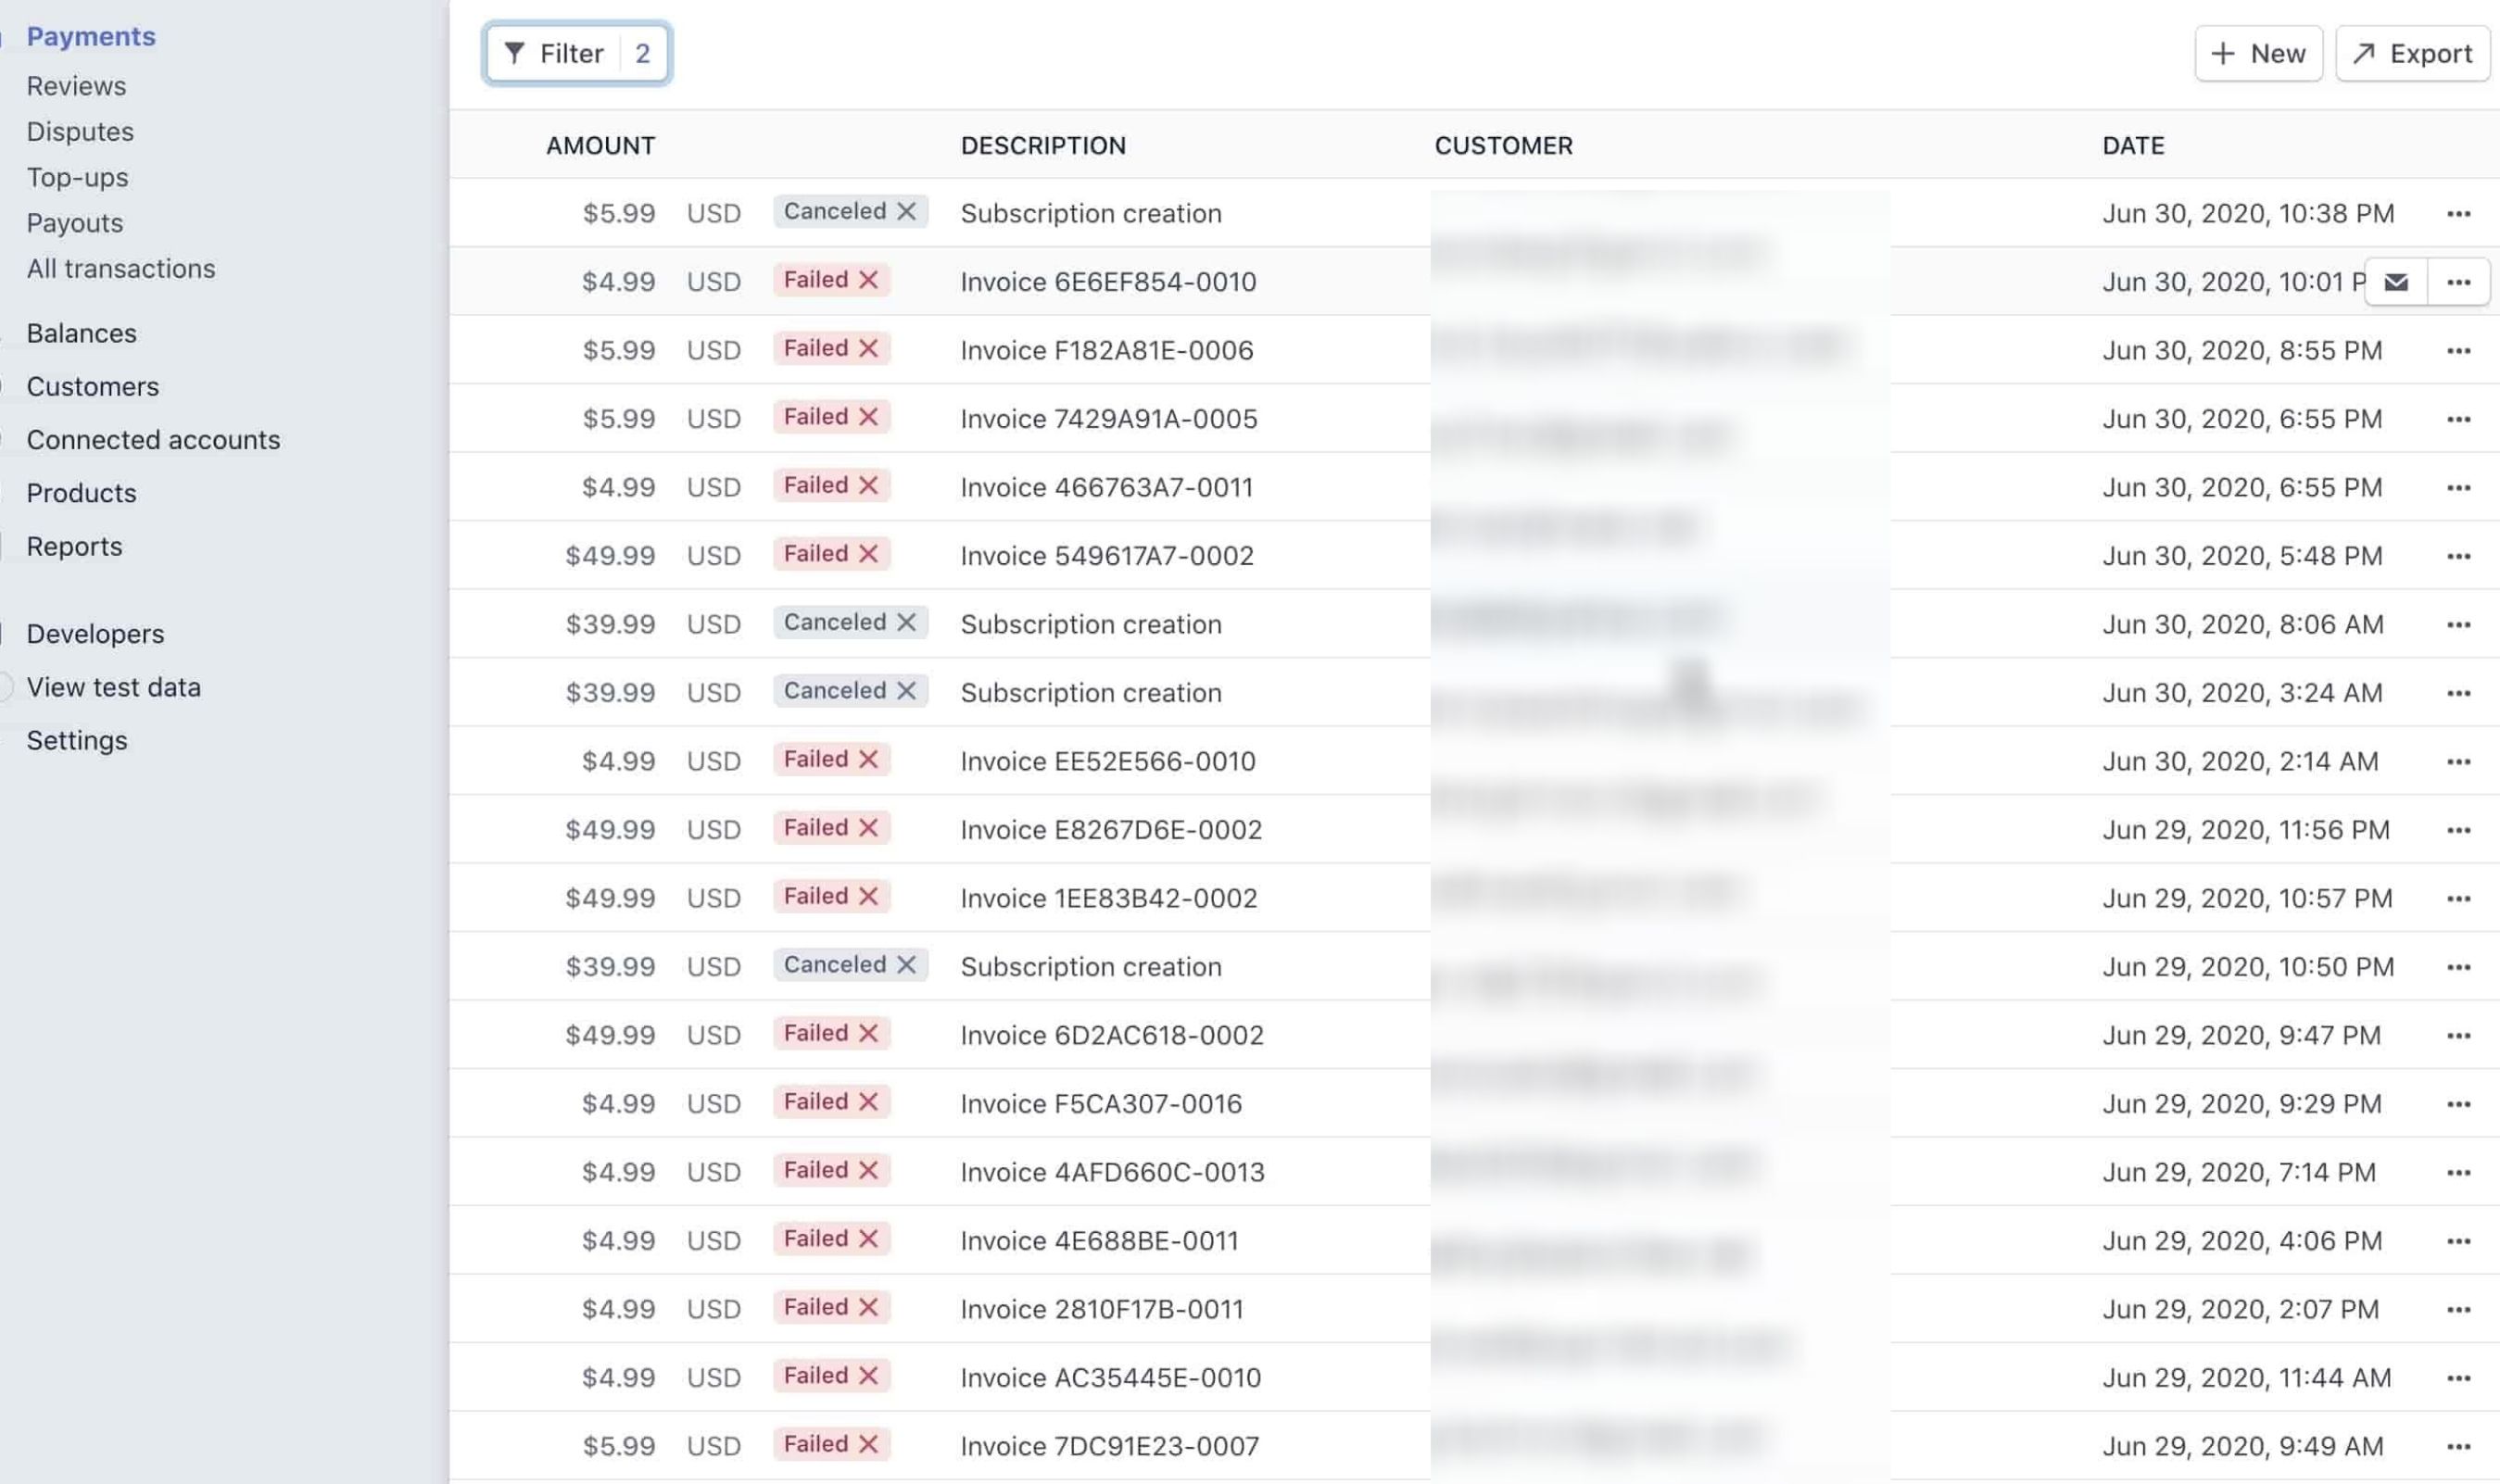
One thing to note regarding this filter: You will notice there are two different categorizations Stripe uses for Failed payments.
One in “Canceled” and the other is “Failed.”
These are two different distinctions that Stripe is making for you:
- Canceled - Notes a Failed Payment where a customer creates a subscription then cancels before their next charge. Stripe will not initiate a retry in this instance or send a dunning email.
- Failed - Denotes a failed credit or debit transaction, where the bank would not accept payment. Payment fails happen for all kinds of reasons.
Export Failed Payments to CSV
While Stripe gives you the failed payment report within the dashboard, it’s not helpful in sorting or deduplicating those failed payments.
In order to get a full picture, you’ll need to export to CSV.
Exporting in Stripe is pretty simple - although, there are a couple things you should make sure of.
-min.jpeg)
This first thing you should do is choose the “All Columns Option” for the export. This is going to far more information for you to sort through to come up with insights as to why customers are failing in payments - and perhaps offer some ideas for retention practices.
Some of the additional columns of information you get from choosing all include:
- Card Brand
- Card Exp Month
- Card Exp Year
- Card Funding
- Dispute Reason
You can use all of these in reporting to countermeasure against involuntary churn.
%20(1)-min.jpeg)
Sort & Deduplicate Payment Fails
Once you finish exporting and get your data into a sheet, the next step is to sort and deduplicate the data.
When Stripe exports Failed Payment Data, it exports ALL the payment data. This includes every retry and failed attempt. So often, the exported spreadsheet isn’t an accurate reflection of your Failed Payment reality.
Take this sheet for example, which has 1,282 rows of data:
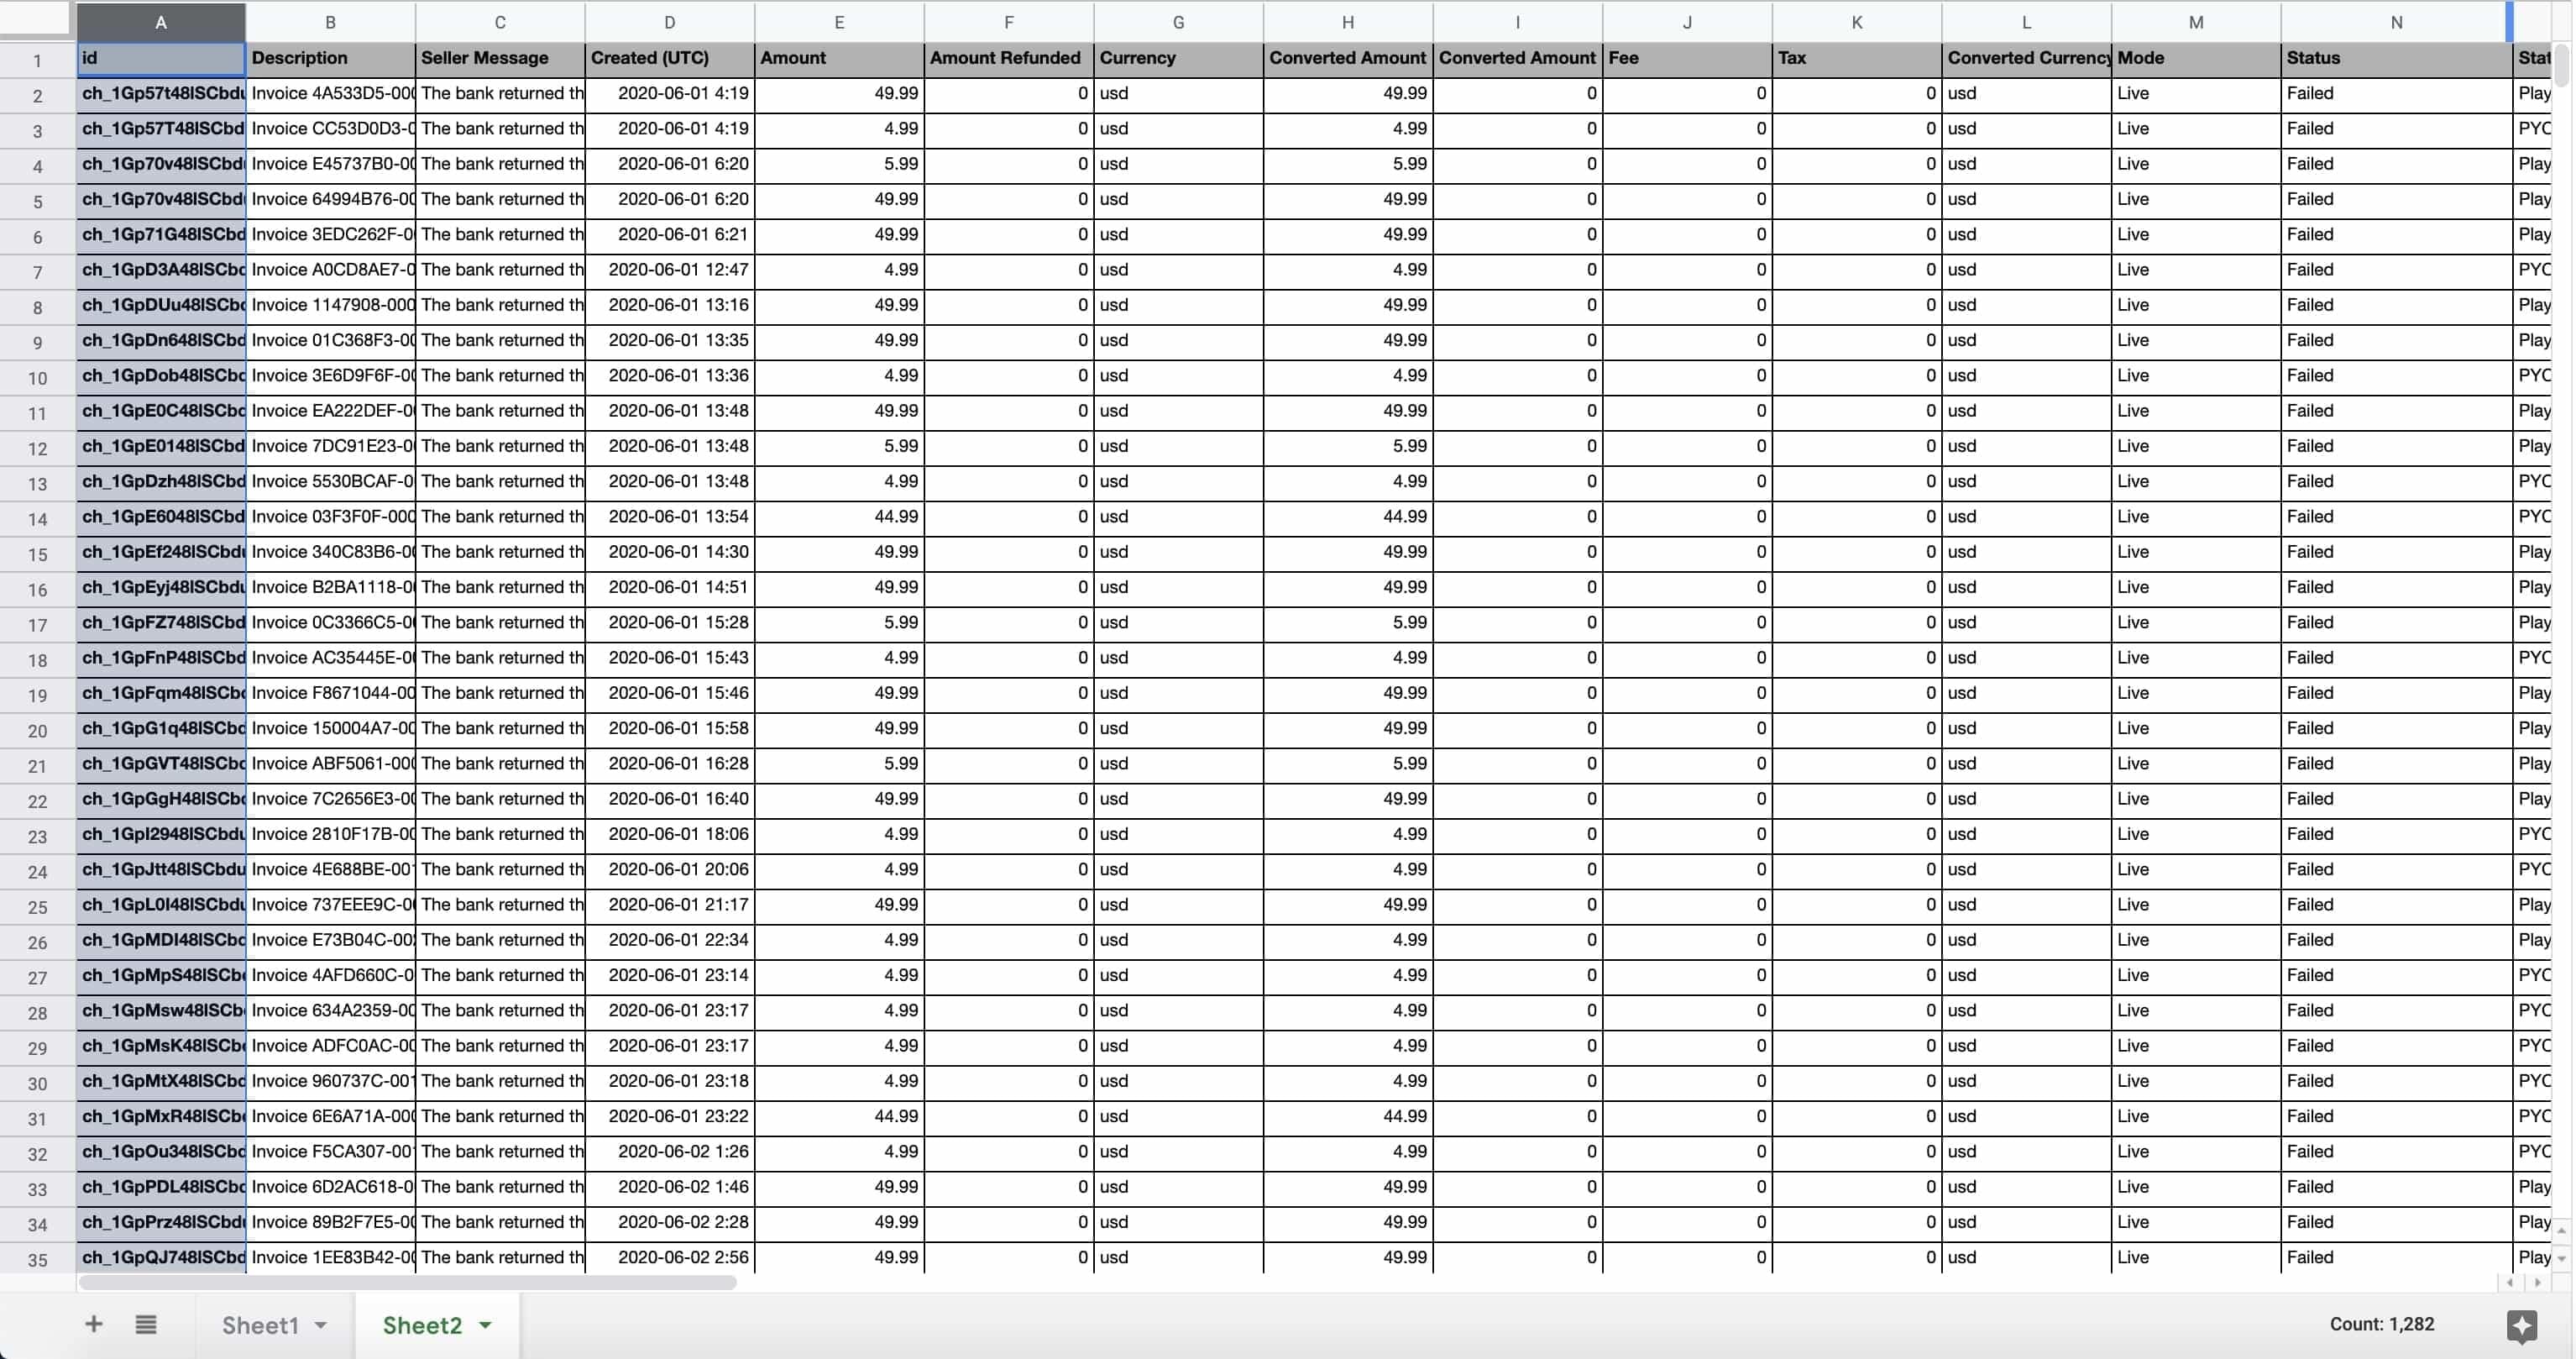
While they may seem like a LOT to sort over, a big reason why is because most of it is Stripe trying to get the same person’s payment through over and over again.
So how do you clean this sheet up?
You deduplicate!
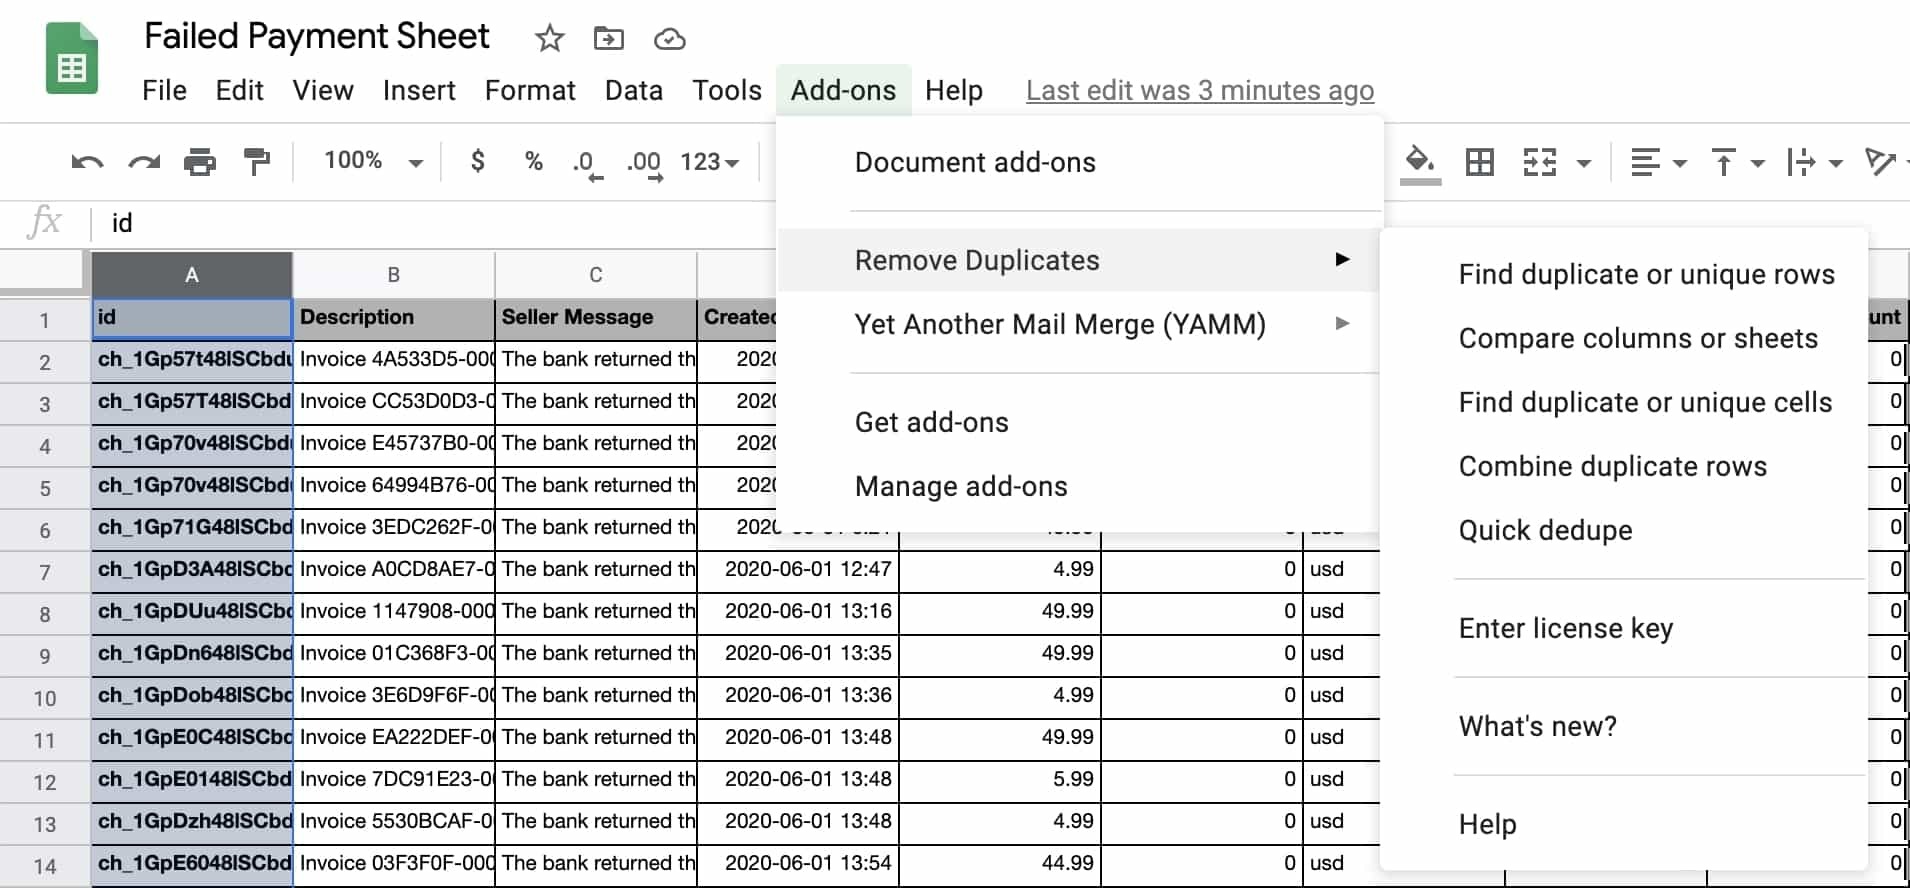
Google Sheets has a nifty add-on tool called “Remove Duplicates” that will allow you to get rid of those repeat email addresses.
Here’s how to use it:
- Go to “Add-ons” → “Remove Duplicates” → “Find duplicate or unique rows”
- Choose the entire spreadsheet cell range and click “Next”
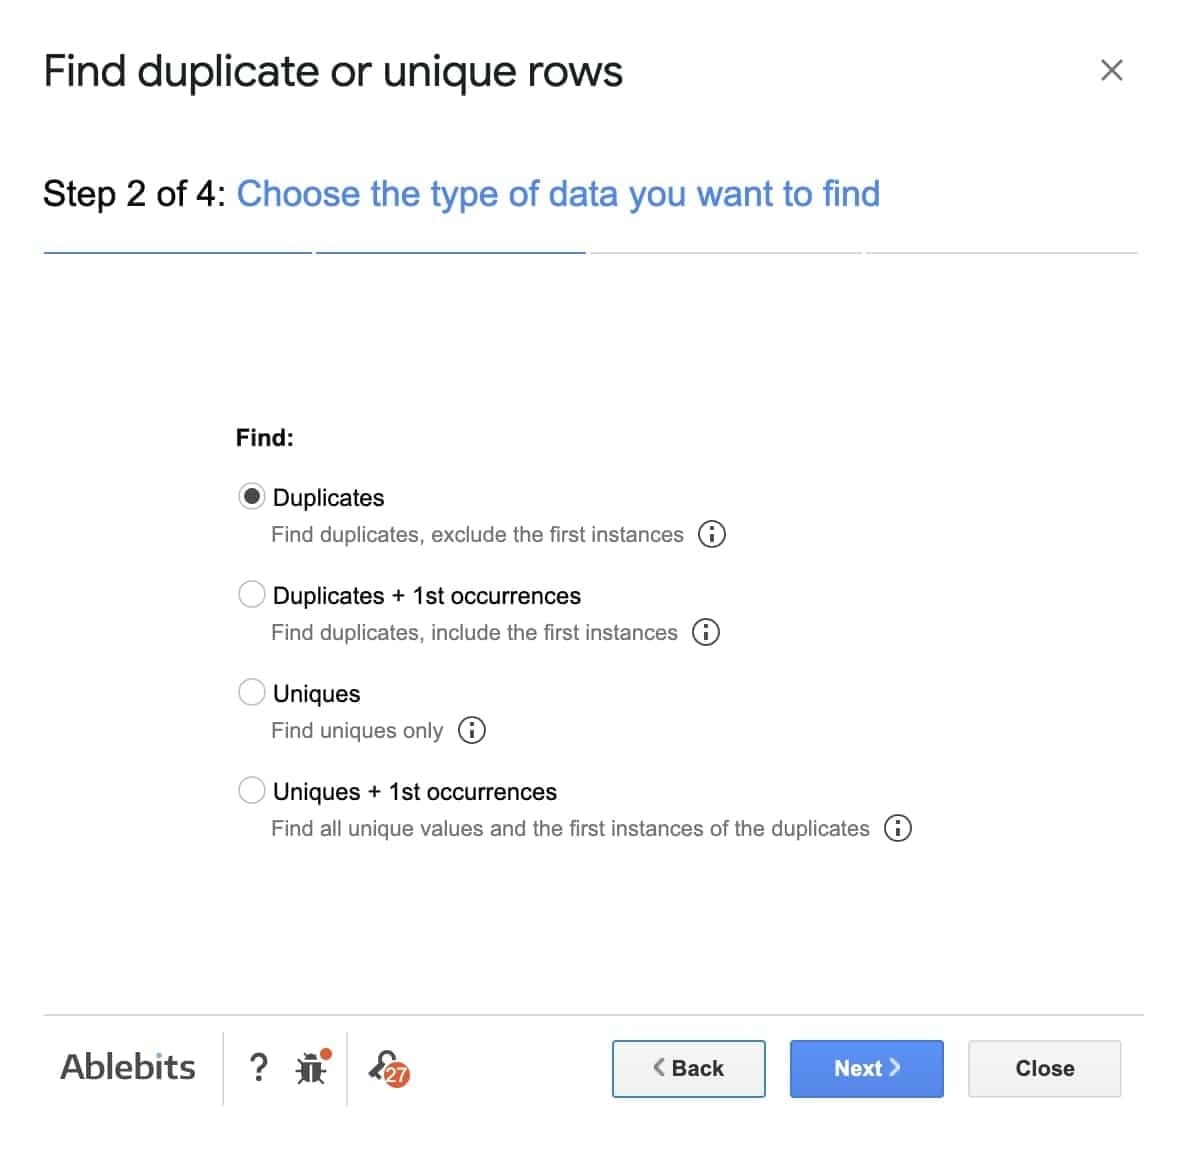
- Choose “Find Duplicates”, click “Next”
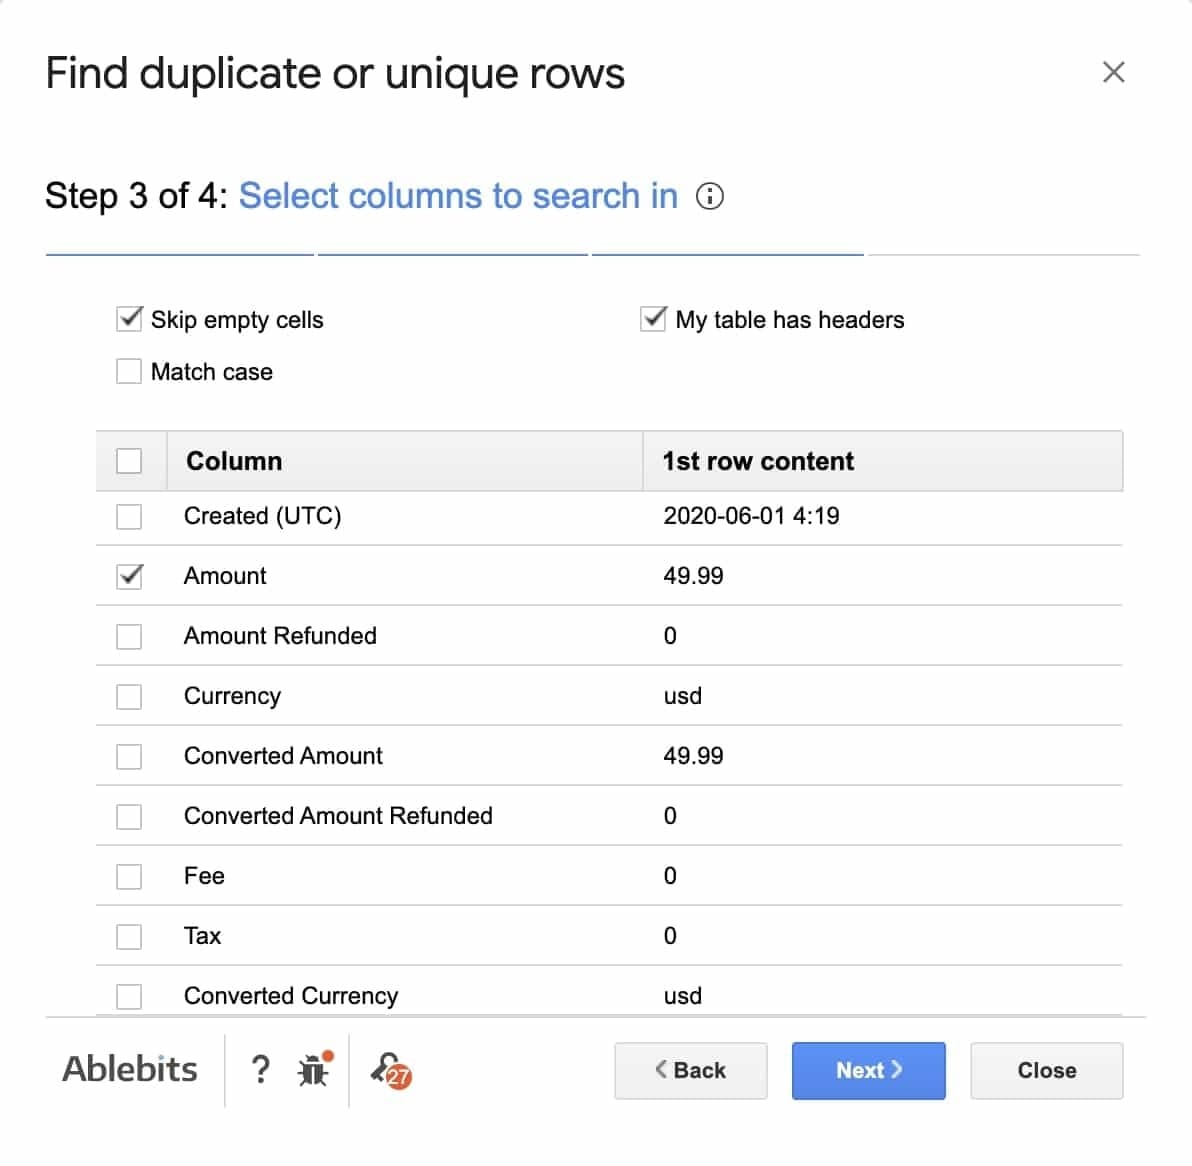
- Uncheck all the columns, then choose “Amount” and “Customer Email”, and click “Next”
- Choose the desired action with the found values, then click “Next”
Note: you have two choices here and either will work. You can either color code the duplicate cell or you can have Google Sheets automatically delete the chosen duplicate rows.
For this exercise, we chose to color code the duplicate rows, which will add a couple more steps to the process:
- Add a Filter to the Top Row
- Go to “Filter by color” → “Fill Color” → “yellow” (or whichever color you choose)

After that, check the rows as you see fit, then select and delete all the duplicates.
Find Failed Payments
After you get your spreadsheeting deduplicated, now you can finally see what your Failed Payment data truly looks like.
Add a blank row at the top of your sheet, then insert the SUM function. Google’s smart enough to automatically pick the cell range, and you can see where you’re at for Failed Payments:
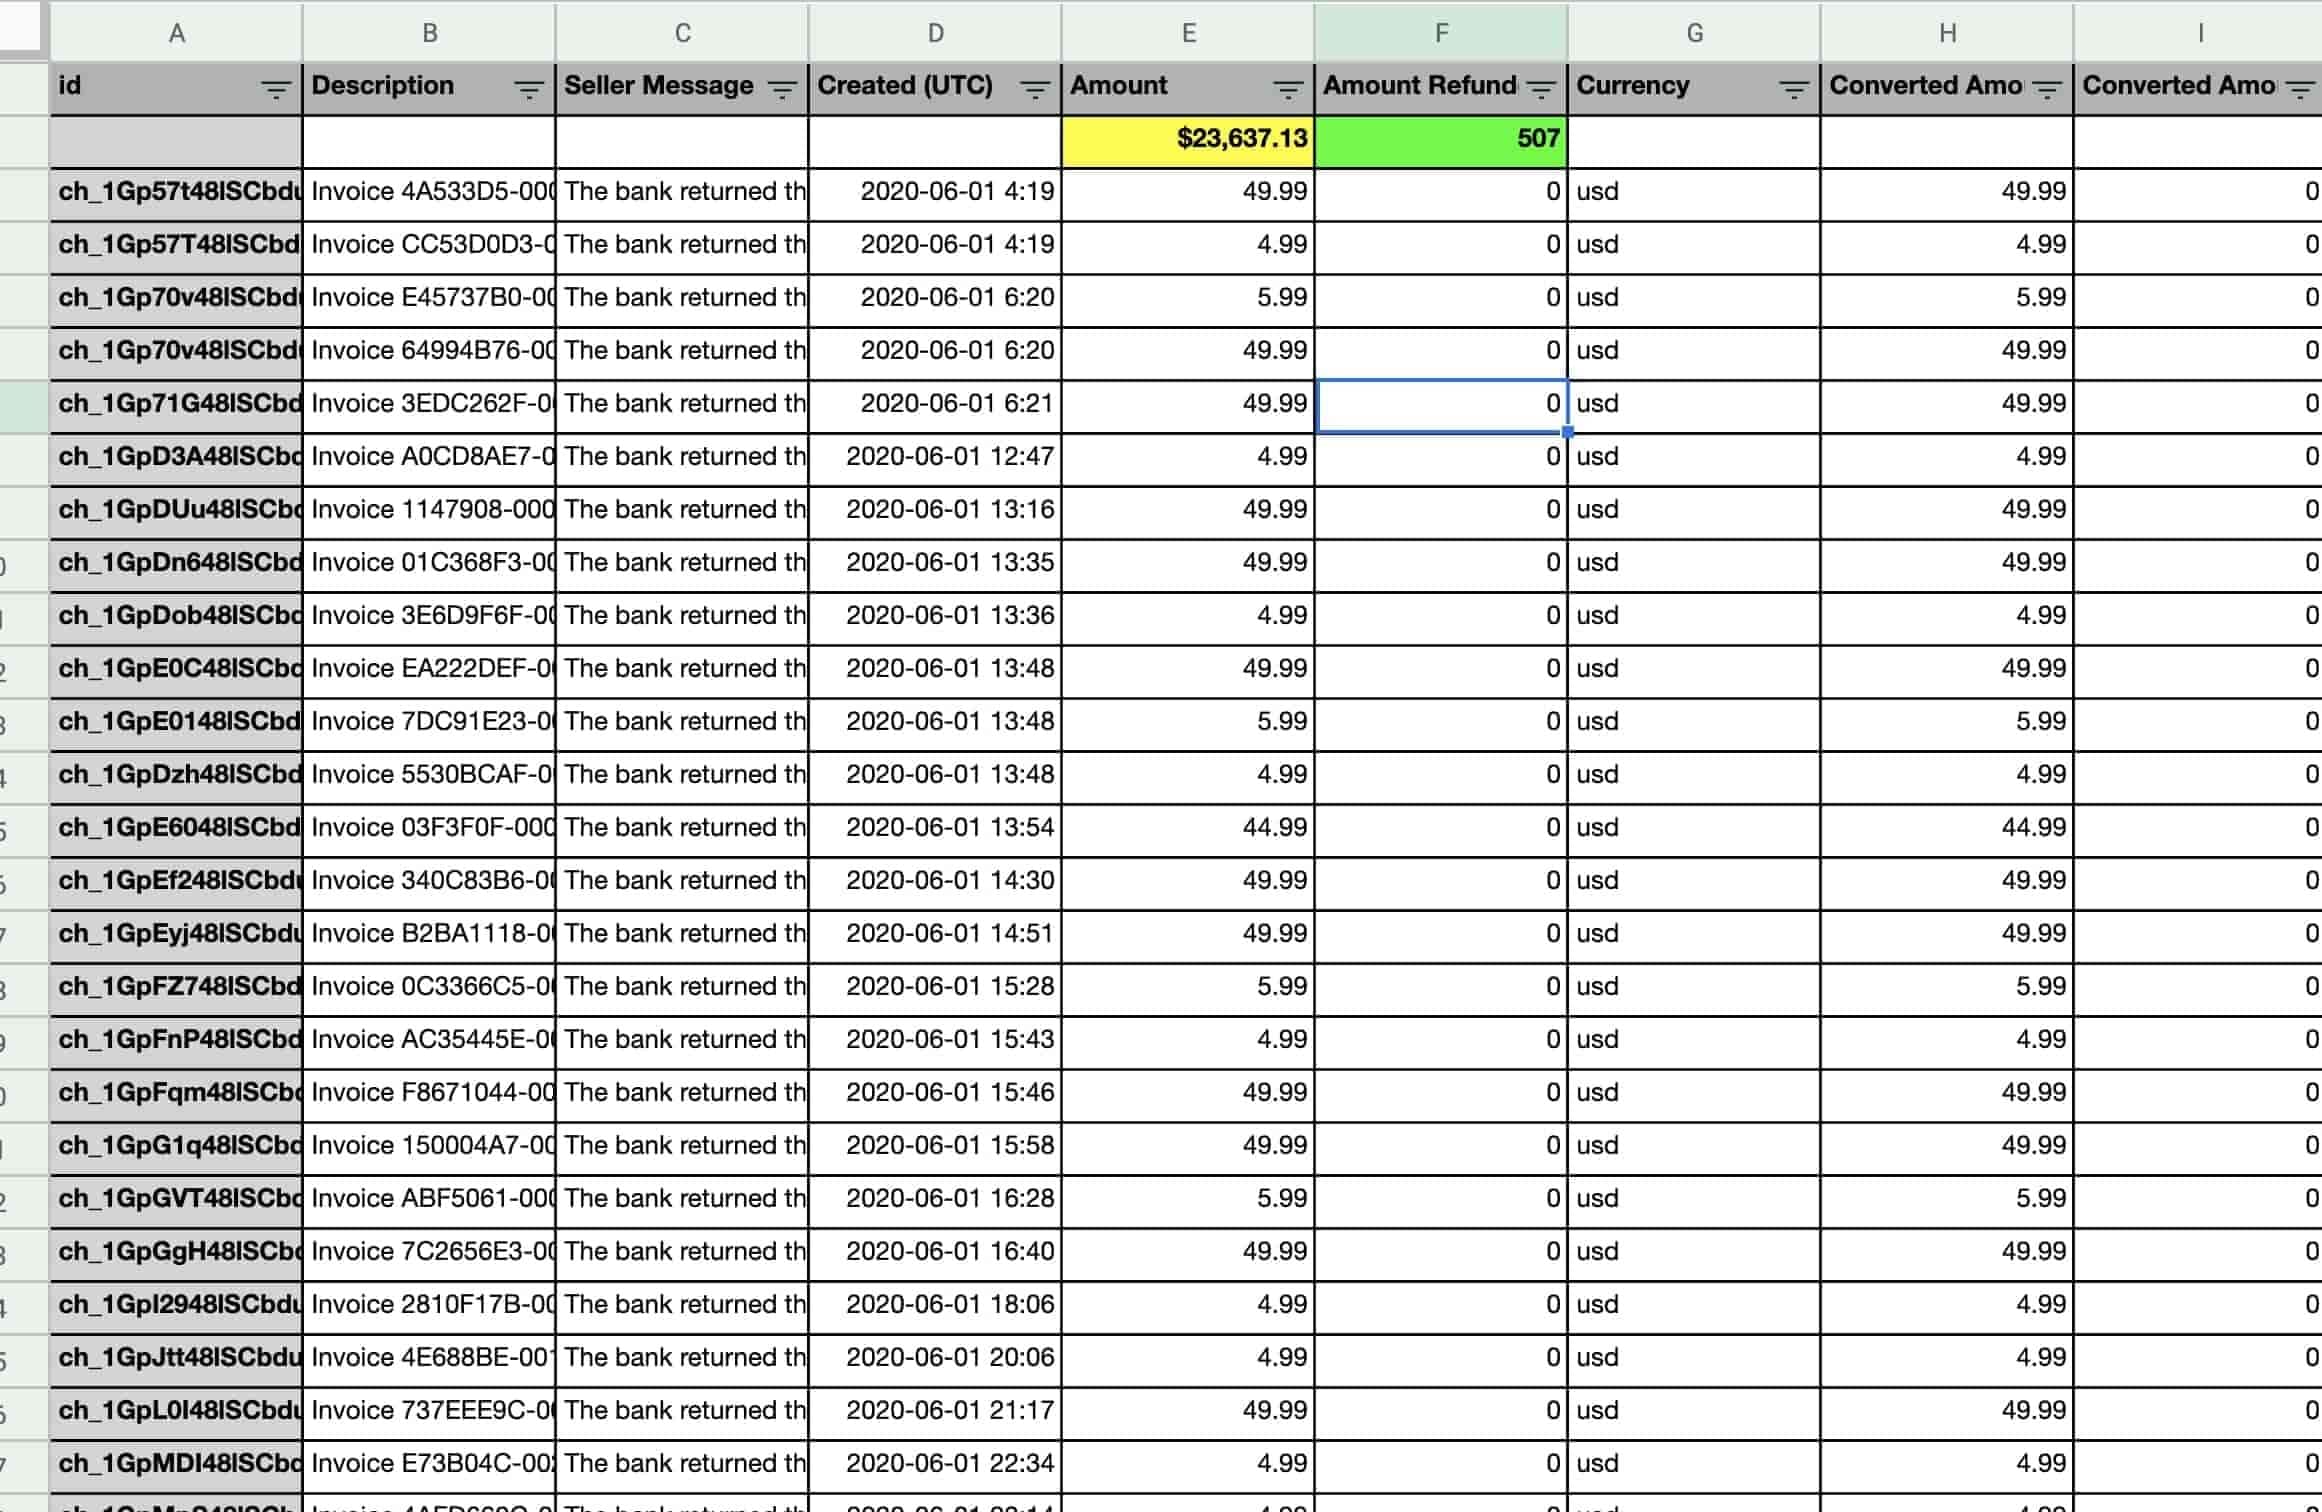
As you can see on the sheets, this example has more than $23,000 in failed payments for the month of June.
Yikes.
So what’s the total count of Failed Payments? Use the COUNT function to count up any total cell range.
In this example, this company has 507 unique Failed Payments for the month of June.
Next Steps
Now that you’ve figured out how much revenue you’re losing to failed payments, what are your next steps?
First, you can contact us by hitting the Chat feature on the bottom right.
We’d be thrilled to discuss your failed payment challenges and how we can uniquely solve them in ways traditional dunning processes are unable to.
In the absence of that, here’s other ways to go about assessing and dealing with involuntary churn:
- Activate Your Dunning Software. Yes, dunning is only going to recover between 10 - 15% of your failed payments, but even that is far better than doing nothing.
- Execute a Standard Operating Procedure. In reality, this is an extremely complex operation to do effectively, requiring a lot of tedious data mining work plus an effective communication and iteration process. There are some companies with the size and human resources to do this, however. For others, it’s simply not that cost effective.
- Utilize Collections. This should only be used if your goal is to simply try and recoup payment - and only if you have legal grounds to do so. You can set your payment merchant and subscription CRM to continue delivering content / services even if the customer is delinquent, and use this method to collect payment. However, you’re nearly certain to lose this customer off a poor brand experience.
- Failed Payment Recovery Services. This is where Gravy comes in. Our service is predicated on being far more humanizing than a dunning software and way more compassionate than collections. This leads to a 50% or better Failed Payment recovery rate with Customers that keep paying.

.jpg)


